Sign In
Upload
Manuals
Brands
Mitsubishi Electric Manuals
Robotics
MELFA RH-12SQH Series
Mitsubishi Electric MELFA RH-12SQH Series Manuals
Manuals and User Guides for Mitsubishi Electric MELFA RH-12SQH Series. We have
3
Mitsubishi Electric MELFA RH-12SQH Series manuals available for free PDF download: Installation Description, Instruction Manual
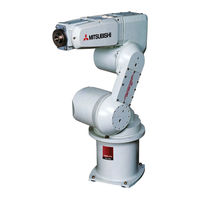
Mitsubishi Electric MELFA RH-12SQH Series Installation Description (186 pages)
Industrial robots
Brand:
Mitsubishi Electric
| Category:
Robotics
| Size: 12.91 MB
Table of Contents
Table of Contents
13
1 Introduction
17
Name of Model
18
Basic Safety Instructions
20
Environmental Conditions for Operation
21
Performance Level (PL) Compliant with en ISO 13849-1
21
2 System Overview
23
Scope of Delivery
23
SD Series
23
SQ Series
24
System Configuration
25
SD Series
25
SQ Series
26
Components of the Robot Arm
27
Control Units
30
Control Panel
30
CR1DA Components
32
CR2DA Components
33
CR1QA Components
35
CR2QA Components
36
Robot CPU (SQ Series Only)
37
Teaching Box
38
R28Tb
38
R32Tb
40
R46TB and R56TB
42
3 Installation
45
Unpacking the Robot System
45
Unpack the Articulated Arm Robot
45
Unpack SCARA Robot
48
Transport Robot Arm
51
RV-2SD and RV-2SQ
51
RV-3SD/3SDJ and RV-3SQ/3SQJ
52
RV-6SD/6SDL, RV-6SQ/6SQL, RV-12SD/12SDL and RV-12SQ/12SQL
54
Rh-6Sdh/6Sqh
56
RH-12SDH/20SDH and RH-12SQH/20SQH
57
RH-3SDHR and RH-3SQHR
58
Set up the Robot Arm
60
Set up the Articulated Arm Robot
60
Set up the SCARA Robot
62
Handling the Control Unit
66
Transport Control Unit CR1DA and Drive Unit DU1A
66
Transport Control Unit CR2DA and Drive Unit DU2A
66
Installing the CR1DA Control Unit and the DU1A Drive Unit
67
Set up Control Unit CR2DA and Drive Unit DU2A
68
Installation of Robot CPU Q172DRCPU
69
Installation and Removal of Modules
70
Grounding the Robot System
72
4 Connection
75
Connection of the Connection Cable
75
Connect the Robot Arm to the Control Unit
75
Connection of Robot CPU to the Drive Unit
77
Mains Connection and Grounding
79
Control Unit CR1DA and Drive Unit DU1A
79
Control Unit CR2DA and Drive Unit DU2A
80
EMERGENCY-STOP Connection
81
Safety Circuits
84
Teaching Box Connection
87
5 Startup
89
Calibrate the Robot System
89
Work Flow
89
Prepare the System for Maintenance Mode
89
Set the Home Position (Zero Point)
94
6 Operation of Teaching Box R32TB
99
Menu Tree
99
Enter a Character
103
Select a Menu Item
105
Move Robot in JOG Mode
107
JOG Modes
107
7 Troubleshooting and Maintenance Instructions
109
Faults in Automatic Mode
109
Troubleshooting
109
Error Diagnosis
110
Replace the Fuses
111
Fuse and Error Messages
111
Fuse for Pneumatic Gripper Hand
111
Fuse of Power Supply of Pneumatic Gripper Hand
112
Instructions on Maintenance
113
A Annex
115
Dimensions
115
Working Areas of the Robot
115
Dimensions of the Control Units, the Drive Units and the CPU
131
Advertisement
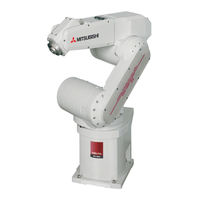
Mitsubishi Electric MELFA RH-12SQH Series Installation Description (160 pages)
Industrial robots
Brand:
Mitsubishi Electric
| Category:
Robotics
| Size: 13.12 MB
Table of Contents
Table of Contents
13
1 Introduction
17
Name of Model
18
Basic Safety Instructions
19
Environmental Conditions for Operation
20
Performance Level (PL) Compliant with en ISO 13849-1
20
2 System Overview
21
Scope of Delivery
21
SD Series
21
SQ Series
22
System Configuration
23
SD Series
23
SQ Series
24
Components of Robot Arm
25
Control Units
27
Control Panel
27
CR2D Components
29
CR3D Components
30
CR2Q Components
31
CR3Q Components
32
Robot CPU (SQ Series Only)
33
Teaching Box
34
R28Tb
34
R32Tb
36
R46TB and R56TB
38
3 Installation
41
Unpacking the Robot System
41
Unpack the Articulated Arm Robot
41
Unpack the SCARA Robot
43
Transport Robot Arm
44
RV-3SD/3SDJ and RV-3SQ/3SQJ
44
RV-6SD/6SDL, RV-6SQ/6SQL, RV-12SD/12SDL and RV-12SQ/12SQL
46
Rh-6Sdh/6Sqh
48
RH-12SDH/18SDH and RH-12SQH/18SQH
49
Set up the Robot Arm
50
Set up the Articulated Arm Robot
50
Set up the SCARA Robot
52
Handling the Control Unit
54
Transport Control Unit CR2D and Drive Unit DU2
54
Transport Control Units CR3D and Drive Units DU3
55
Set up Control Unit CR2D and Drive Unit DU2
56
Set up Control Unit CR3D and Drive Unit DU3
57
Installation of Robot CPU Q172DRCPU
58
Installation and Removal of Modules
59
Grounding the Robot System
61
4 Connection
63
Connection of the Connection Cable
63
Connect the Robot Arm to the Control Unit
63
Connection of Robot CPU to the Drive Unit
65
Mains Connection and Grounding
67
Control Unit CR2D and Drive Unit DU2
67
Control Unit CR3D and Drive Unit DU3
68
EMERGENCY-STOP Connection
69
Safety Circuits
72
Teaching Box Connection
75
5 Startup
77
Calibrate the Robot System
77
Work Flow
77
Prepare the System for Maintenance Mode
77
Set the Home Position (Zero Point)
82
6 Operation of Teaching Box R32TB
87
Menu Tree
87
Enter a Character
90
Select a Menu Item
92
Move Robot Is JOG Mode
94
JOG Mode
94
7 Troubleshooting and Maintenance Instructions
97
Faults in Automatic Mode
97
Troubleshooting
97
Error Diagnosis
98
Replace the Fuses
99
Fuse for Pneumatic Gripper Hand
99
Fuse of Power Supply of Pneumatic Gripper Hand
100
Instructions on Maintenance
101
8 Annex
103
Dimensions
103
Working Areas of the Robot
103
Dimensions of the Control Units, the Drive Units and the CPU
130
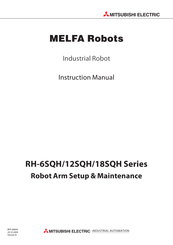
Mitsubishi Electric MELFA RH-12SQH Series Instruction Manual (106 pages)
Brand:
Mitsubishi Electric
| Category:
Robotics
| Size: 3.44 MB
Table of Contents
Table of Contents
8
Before Starting Use
10
Using the Instruction Manuals
10
The Details of each Instruction Manuals
10
Terminological Definition
11
Symbols Used in Instruction Manual
12
Safety Precautions
13
Precautions Given in the Separate Safety Manual
14
Unpacking to Installation
16
Confirming the Product
16
Installation
17
Unpacking
17
Transportation Procedures(Transportation by People: RH-6SQH Series)
17
Transportation Procedures(Transporting with a Crane: RH-12SQH/18SQH Series)
19
Installation Procedures
20
Grounding Procedures
22
Grounding Methods
22
Connecting with the Controller
23
Procedure for Wiring the Hand Output Cables
25
Spare Wiring
26
2 Arm Area
26
Base Area
28
Connection of Piping for Air Pressurization
30
Connection of Piping for Suction
30
Setting the Origin
31
Installing the Teaching Pendant (T/B)
31
Setting the Origin with the Origin Data Input Method
32
Confirming the Origin Data
32
Turning on the Control Power
32
Preparing the T/B
33
Selecting the Origin Setting Method
34
Inputting the Origin Data
35
Installing the J1 Cover
36
Confirming the Operation
37
JOINT Jog Operation
41
XYZ Jog Operation
43
TOOL Jog Operation
45
3-Axis XYZ Jog Operation
47
CYLNDER Jog Operation
49
Work Jog Operation
51
Installing the Option Devices
57
Installing the Solenoid Valve Set (1S-VD04M(E)-03, 1S-VD04M(E)-04)
58
Installing the Hand Input Cable
60
Installing the Hand Output Cable
61
Changing the Operating Range
62
J1 and J2 Axis
62
Operating Range Changeable Angle
62
Installing the Mechanical Stopper
63
Setting the Operation Range Parameter
63
Setting the Mechanical Stopper Origin Parameter
64
Confirming the Operation Range
64
Basic Operations
65
Maintenance and Inspection
66
Maintenance and Inspection Interval
66
Inspection Items
67
Daily Inspection Items
67
Periodic Inspection
68
Maintenance and Inspection Procedures
69
Robot Arm Structure
69
Installing/Removing the Cover
70
Inspection, Maintenance and Replacement of Timing Belt
71
Timing Belt Replacement Period
71
Inspection, Maintenance and Replacement of J3-Axis Timing Belt
72
Inspection, Maintenance and Replacement of J4-Axis Timing Belt
74
Timing Belt Tension
76
Replacing Bellows
77
How to Replace the Top Bellows
77
How to Replace the Bottom Bellows
79
Lubrication
80
Lubrication Position and Specifications
80
Lubrication Method to the J1, J2 Axis
80
Lubrication Method to the Shaft
81
Replacing the Backup Battery
82
Replacing the Robot Arm Battery
83
Maintenance Parts
84
Resetting the Origin
85
Jig Method
86
J1 Axis Origin Setting
87
J2 Axis Origin Setting
89
J3 Axis Origin Setting
91
J4 Axis Origin Setting
93
J5 Axis Origin Setting
95
J6 Axis Origin Setting
97
ABS Origin Method
99
Select the T/B
100
User Origin Method
101
Recording the Origin Data
103
Confirming the Origin Data Label
103
Confirming the Origin Data
103
Installing the Cover
103
6Appendix
104
Appendix 1 : Configuration Flag
104
Advertisement
Advertisement
Related Products
Mitsubishi Electric RH-1FHR-S60 Series
Mitsubishi Electric RH-1FHR Series
Mitsubishi Electric MELFA RH-12SDH Series
Mitsubishi Electric RH-18SDH
Mitsubishi Electric RH-18SQH
Mitsubishi Electric RH-1FRHR5515
Mitsubishi Electric RH-12FHM-SE Series
Mitsubishi Electric MELFA RH-10CRH Series
Mitsubishi Electric MELFA RH-3CRH Series
Mitsubishi Electric MELFA RH-2FRH Series
Mitsubishi Electric Categories
Air Conditioner
Controller
Projector
Inverter
Heat Pump
More Mitsubishi Electric Manuals
Login
Sign In
OR
Sign in with Facebook
Sign in with Google
Upload manual
Upload from disk
Upload from URL